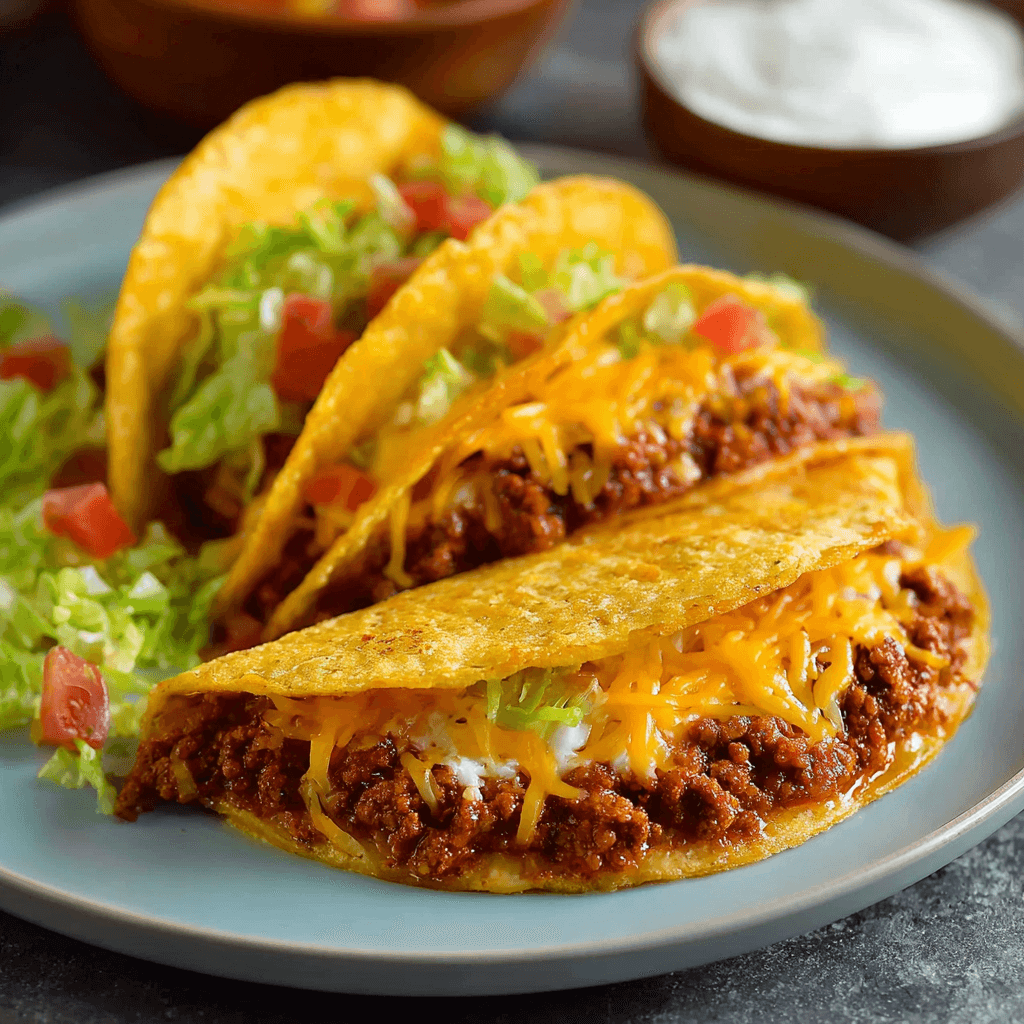
Crispy Baked Ground Beef Tacos (The No-Fuss Method)
These oven-baked tacos deliver perfectly crispy shells and a savory, juicy filling without the mess of frying. It’s the ideal weeknight solution for a fast, crowd-pleasing meal. While I adore slow-cooked comfort foods like my Tender Slow Cooker Beef & Broccoli, sometimes you need dinner on the table in 30 minutes, and this recipe delivers.
Why This Method Works: The Oven-Baked Advantage
Baking tacos is a game-changer for taco night. It solves the most common problems while saving time and effort.
- Maximum Crispiness: The hot, dry air of the oven circulates around the shells, baking them until they are shatteringly crisp from edge to edge.
- No Greasy Mess: Forget hot oil splattering all over your stovetop. This method is clean, contained, and much safer.
- Perfect for a Crowd: You can bake a dozen tacos at once on a single sheet pan. No more standing over a skillet frying shells one by one while the family waits.
- Melted Cheese Guarantee: The cheese melts directly into the meat and the shell, creating a delicious glue that holds everything together.
The Anatomy of a Perfect Taco Filling
The heart of any great taco is the filling. The goal here is juicy and flavorful, but not watery, which can lead to soggy shells.
- The Right Fat Content: Use 85/15 or 80/20 ground beef. The fat adds immense flavor and moisture. Be sure to drain off the excess grease after browning to prevent a greasy final product.
- Seasoning Strategy: A good taco seasoning packet is a reliable shortcut. For a DIY blend, combine chili powder, cumin, paprika, onion powder, garlic powder, and a pinch of oregano.
- Moisture is Key: After browning the beef and draining the fat, add about 1/2 cup of water, beef broth, or even tomato sauce along with your seasonings. Let it simmer until the liquid reduces and thickens, coating the meat. This rehydrates the beef and creates a saucy, not soupy, consistency.
Pro-Tips for Assembly Line Success
The key to non-soggy, well-structured baked tacos is in the assembly. A little prep makes all the difference.
- Pre-Bake the Shells: Place the empty taco shells directly on the oven rack for 3-4 minutes at 375°F. This dries them out slightly and prepares them to be filled without breaking.
- Use a Baking Dish as a Stand: To make filling easier, arrange the warm shells upright in a 9×13 inch baking dish. They will prop each other up, leaving your hands free.
- Layer Intelligently: Add a layer of cheese to the bottom of the shell before the meat. This creates a moisture barrier, protecting the shell from the filling.
- Don’t Overfill: Use about 2-3 tablespoons of filling per shell. Overstuffing leads to breakage and a messy eating experience. Remember, you’ll be adding plenty of fresh toppings later.
Step-by-Step Instructions
- Preheat & Prep: Preheat oven to 375°F (190°C). Arrange 12 hard taco shells standing up in a 9×13 inch baking dish or carefully propped against each other on a baking sheet. Bake for 3-4 minutes to warm and crisp them.
- Cook the Filling: In a large skillet over medium-high heat, brown 1 lb of ground beef, breaking it apart with a spoon. Cook until no pink remains.
- Drain & Season: Carefully drain the excess grease from the skillet. Return it to the heat and stir in 1 packet of taco seasoning and 1/2 cup of water. Simmer for 3-5 minutes, until the sauce has thickened and coats the meat.
- Assemble Tacos: Sprinkle a small amount of shredded cheese into the bottom of each warmed taco shell.
- Fill the Tacos: Evenly distribute the seasoned beef mixture among the 12 shells.
- Top with Cheese: Top the meat in each taco generously with the remaining shredded cheese.
- Bake: Carefully place the baking dish in the preheated oven. Bake for 8-10 minutes, or until the shells are golden brown and the cheese is fully melted and bubbly.
- Serve Immediately: Remove from the oven and serve immediately with your favorite toppings. This speedy dinner is a favorite in my house, right alongside other quick wins like my 20-Minute Sticky Chicken & Rice Bowls.
Toppings Bar & Serving Strategy
Set up a “build-your-own” toppings bar so everyone can customize their tacos. This makes the meal interactive and fun.
- The Classics: Shredded lettuce, diced tomatoes, chopped red onion, jalapeños.
- The Creams: Sour cream or Greek yogurt, guacamole or sliced avocado, queso fresco.
- The Salsas: Pico de gallo, salsa verde, or your favorite jarred salsa.
- Something Extra: Chopped cilantro, a squeeze of fresh lime juice, pickled red onions.
For a complete and satisfying meal, serve these tacos with a side of Mexican rice and black beans. To truly impress, a show-stopping dessert like a homemade Brown Butter Pear Tart offers a sweet and sophisticated finish.
COMMON MISTAKES TO AVOID
- Mistake: Using cold, straight-from-the-box taco shells.
- Fix: Always pre-bake the shells for 3-4 minutes. This minor step makes them far crispier and less prone to breaking when you fill them.
- Mistake: A watery, soupy meat filling.
- Fix: After adding liquid (water or broth) to your seasoned meat, make sure you simmer it long enough for the sauce to reduce and thicken significantly. It should coat the meat, not pool at the bottom of the pan.
- Mistake: Adding cold, wet toppings before baking.
- Fix: Only bake the tacos with meat and cheese. Add fresh, cold toppings like lettuce, tomato, and sour cream after they come out of the oven. Baking them will make them warm, wilted, and release water, creating a soggy taco.
FAQ
Q: Can I use ground turkey or chicken instead of beef?
A: Absolutely. Ground turkey or chicken works perfectly. Since they are leaner, you may want to add a tablespoon of olive oil to the pan when browning them to prevent sticking and add a little richness.
Q: How can I make these ahead of time for a party?
A: You can prepare the meat filling up to 2 days in advance and store it in an airtight container in the refrigerator. When ready to serve, simply reheat the meat, assemble the tacos as directed, and bake. This makes party prep incredibly efficient. A perfect party menu could pair these tacos with a stunning dessert like this Mango Vanilla Mirror Tart.
Q: What’s the best way to store and reheat leftovers?
A: Store the leftover meat filling separately from any remaining shells and toppings. Reheat the meat in the microwave or on the stovetop. It’s best to assemble and bake fresh tacos with the leftover meat for the best crispy texture.
NUTRITIONAL SNAPSHOT
| Nutrient | Amount per Serving |
|---|---|
| Calories | 385 |
| Protein | 22g |
| Fat | 24g |
| Net Carbs | 18g |
| Fiber | 3g |
| Sugar | 2g |
(Estimates are per taco, with cheese and beef filling, before fresh toppings)
Crispy Baked Ground Beef Tacos (The No-Fuss Method)
Ingredients
- 1 lb ground beef (85/15)
- 1 packet (1 oz) taco seasoning
- 1/2 cup water
- 12 hard taco shells
- 2 cups shredded Mexican cheese blend (cheddar, Monterey Jack)
- Optional Toppings: shredded lettuce, diced tomatoes, sour cream, guacamole, salsa